
- Introduction: Why You Should Connect Mailchimp to Your Domain
- What Connecting Your Domain to Mailchimp Means
- What You Need Before You Start Connecting Your Domain to Mailchimp
- Step-by-Step: How to Connect Your Domain to Mailchimp
- Common Problems and How to Fix Them
- How to Test Whether Mailchimp Is Connected to Your Domain
Introduction: Why You Should Connect Mailchimp to Your Domain
If you are interested in promoting your website and gaining more followers, creating a newsletter form is crucial.
When you have a unique domain for your website, building trust becomes essential. One of the main reasons to connect Mailchimp to your domain is the ability to use a non-generic email address. This helps build trust with people who want to subscribe to your newsletter.
Because of a custom email address, your emails are also less likely to end up in the spam folder.
Finally, delivering newsletters and campaigns from your own domain simply looks more professional and trustworthy.
What Connecting Your Domain to Mailchimp Means
Connecting your domain to Mailchimp is not actually difficult. You mainly need focus and careful copy-pasting.
The process involves verifying your domain, adding DNS records (such as CNAME or TXT records), and setting up email authentication.
What You Need Before You Start Connecting Your Domain to Mailchimp
Before starting to connect your domain, you need to:
- A Mailchimp account
- A custom domain (e.g., yourbrand.com)
- Access to your domain DNS settings (Namecheap, Google Domains, Cloudflare, etc.)
Step-by-Step: How to Connect Your Domain to Mailchimp
Step 1: Go to Domain Settings in Mailchimp
Go to the Mailchimp website and navigate to:
Website → Domains → Settings
Step 2: Choose Verify or Authenticate Domain
Choose Authenticate Domain or Verify Domain.
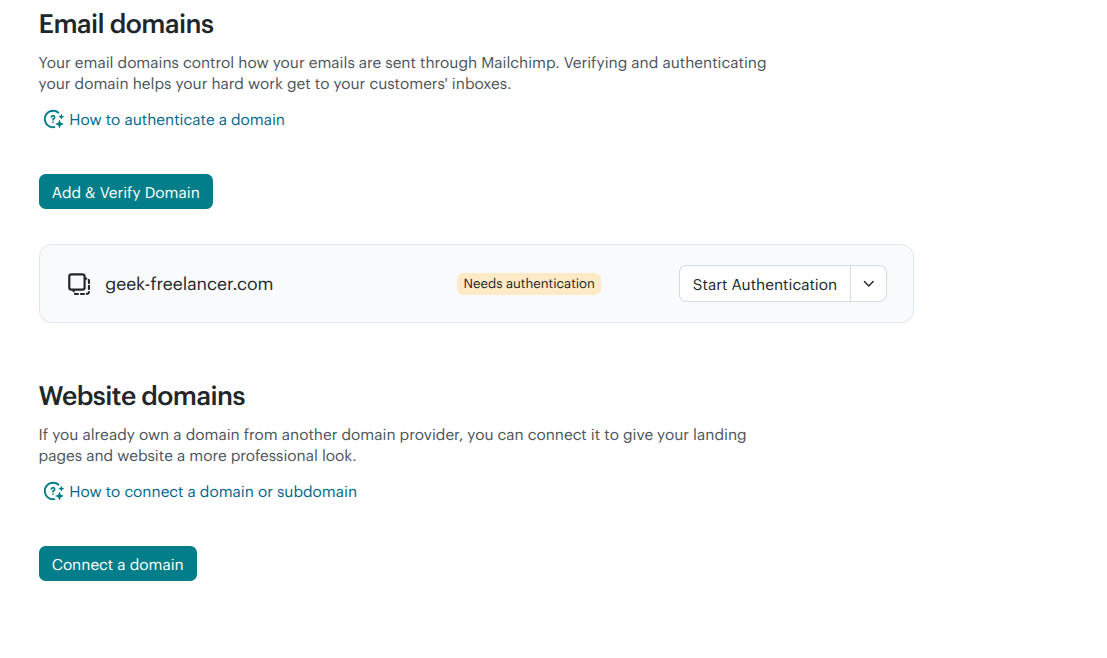
After clicking Add & Verify Domain, you can choose to manually authenticate your domain or use Entri for authentication.
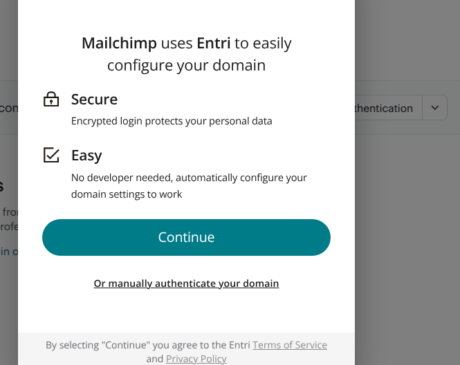
If you choose manual authentication, Mailchimp will provide you with the required DNS records.
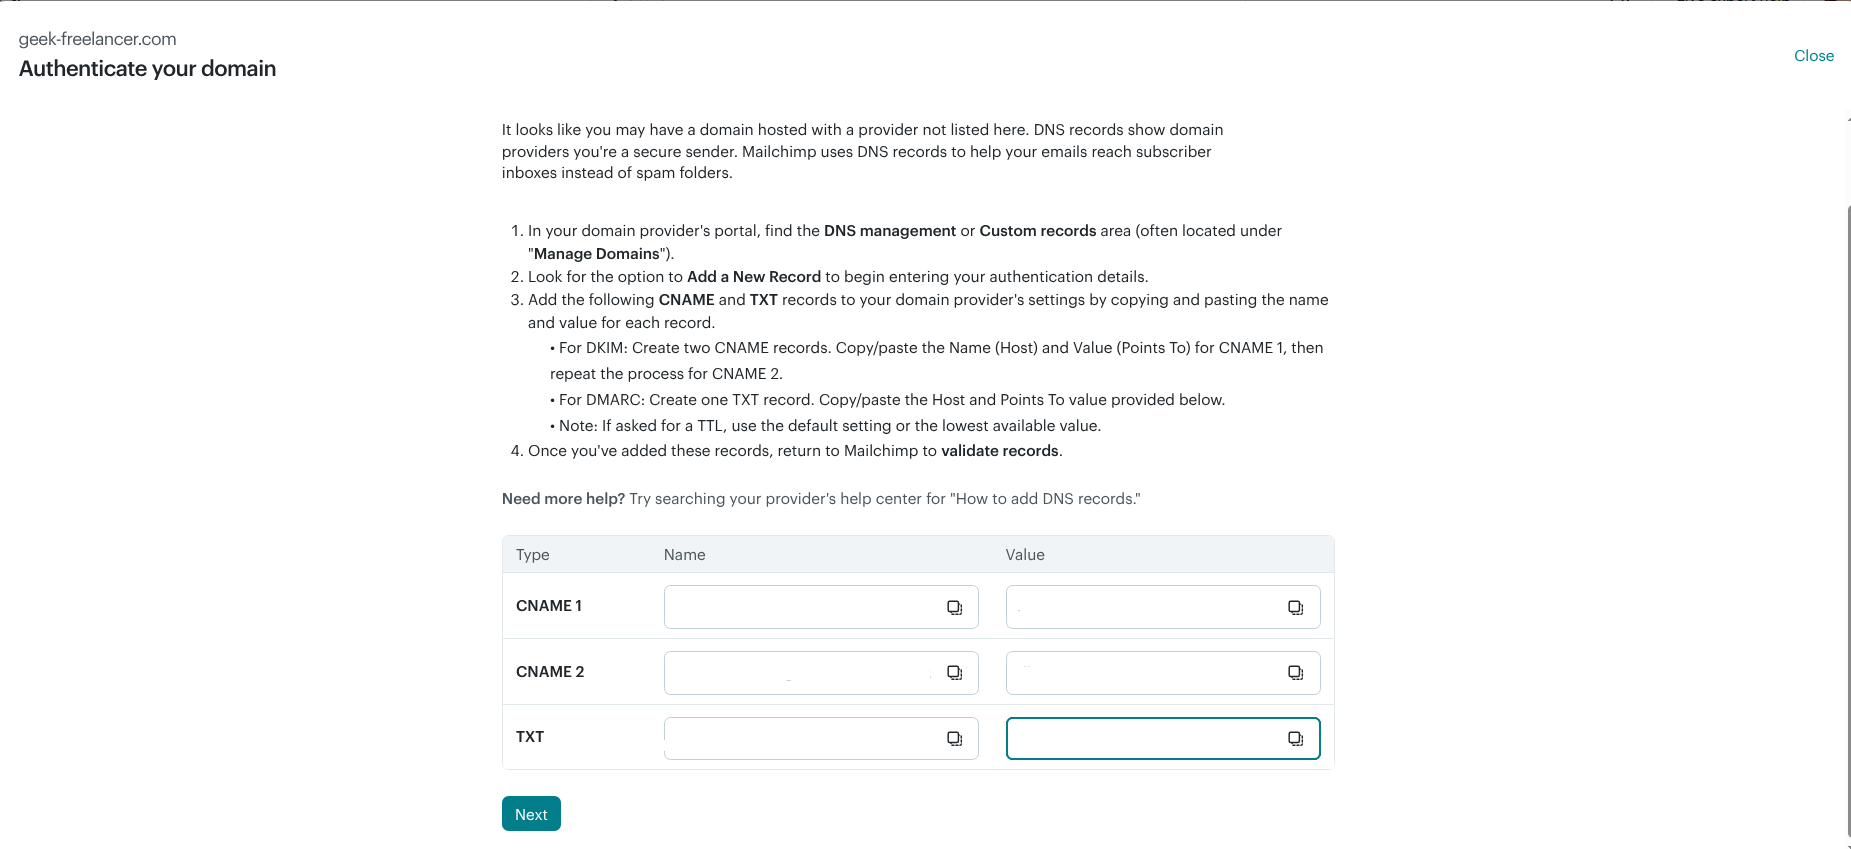
Step 3: Add DNS Records
Log in to your domain provider and add the DNS records exactly as shown in Mailchimp.
- CNAME records are added in Cloudflare or another DNS provider
- DMARC (not “DMARK”) helps manage your domain’s email policy and verifies that emails are legitimate
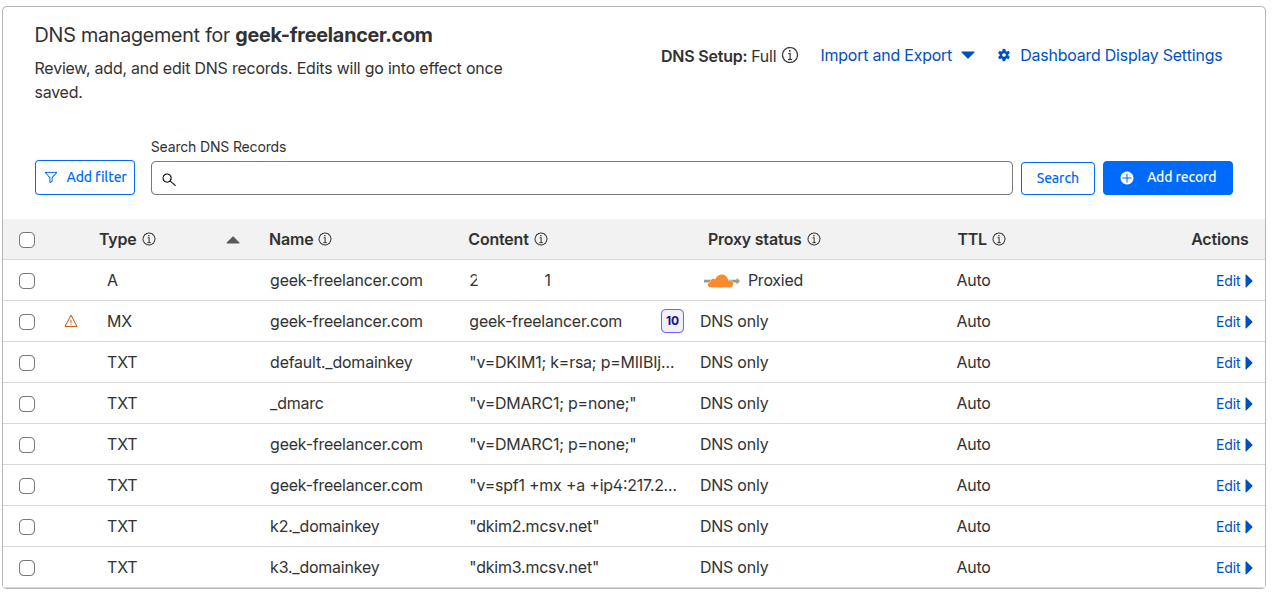
Copy and paste carefully, and don’t change anything else in your DNS settings unless you know what it does.
Step 4: Save and Wait for Verification
After entering the records in your domain provider’s dashboard, click Save in Mailchimp. Your domain will then enter the verification process.
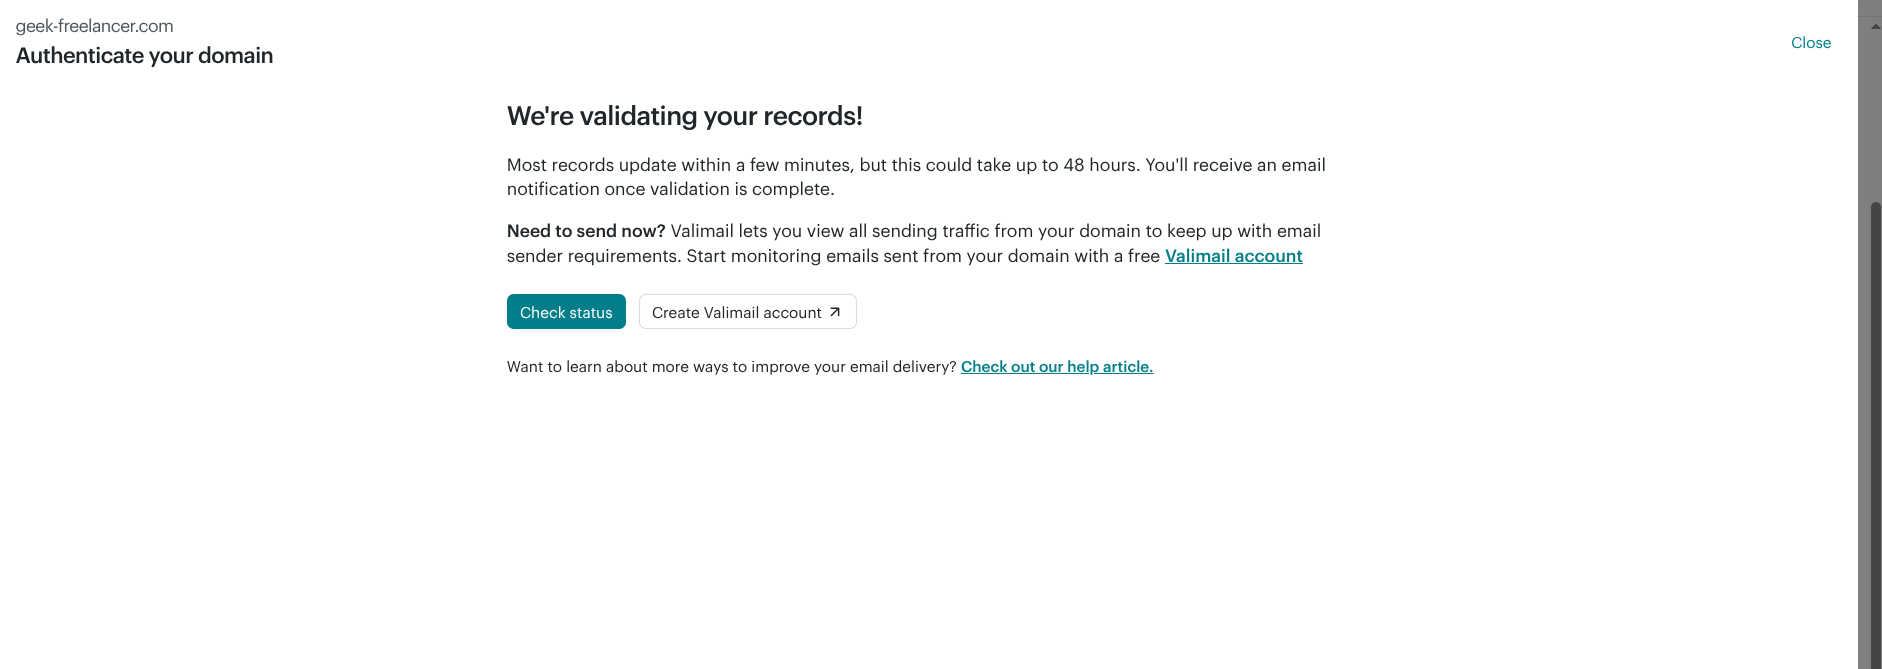
DNS changes can take anywhere from a few minutes to several hours, so domain verification may take some time. You will receive a notification once the process is complete.
Common Problems and How to Fix Them
In some cases, domain verification doesn’t complete successfully. This is often caused by using the wrong record type.
If several hours have passed and you haven’t received a verification notification, check whether the records were added to the correct domain or subdomain — especially if you manage multiple domains.
Another common issue is DNS propagation delay. DNS changes can take 24–72 hours to synchronize across global servers. Using Cloudflare as a DNS provider often speeds up this process.
If you use multiple DNS providers, make sure you only add records where your authoritative DNS is managed.
How to Test Whether Mailchimp Is Connected to Your Domain
Once the domain is verified, Mailchimp will display it as Authenticated under:
Account → Settings → Domains
You can test this by sending a test email to yourself using a test campaign. Always check the From address — it should use your custom domain (for example, [email protected]).
An optional step is to use a mail tester tool.
Once verification is complete, no further configuration is needed. Mailchimp will automatically use your domain for future campaigns.
*This tutorial is part of a broader collection of practical tech tips and workflows.