In the modern world, technology represents a new form of improving health care at the individual level. In the field of diabetes monitoring and insulin therapy, the old ways of checking glucose are still mostly used. A finger is pricked with a lancet to obtain a blood sample. The sample is placed on the test strip and inserted into the glucometer, which reads the results. This whole process is fast, but for many, it is quite unpleasant. That is the main reason why the blood glucose sensor is an important technological development.
In addition to people with diabetes, there are situations in which a person wants to monitor his health condition for a certain period independently. Glucose monitoring is also important before the diagnosis of insulin resistance and diabetes.
The LinX blood glucose sensor represents a significant step forward in individual health analysis. This device enables continuous monitoring of glucose levels in real-time and facilitates better health decisions.
The LinX sensor can be ordered directly through the LinX website or via Aliexpress.
Features of the LinX sensor for measuring glucose
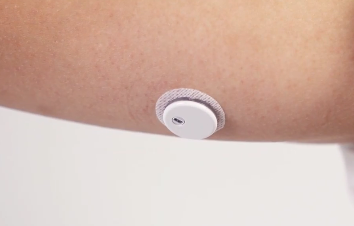
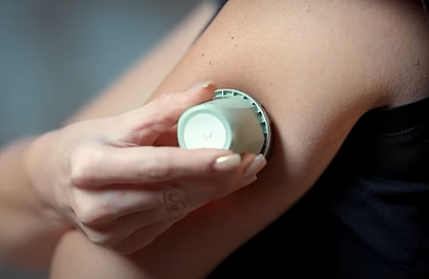
The device with the sensor applied to the skin is light and weighs 2.16 grams, while the diameter is 22 mm. The sensor is waterproof, so you can shower, bathe, train, and swim in water with it. Its working temperature is 5 – 40 degrees Celsius.
The advantage of this device is that during 15 days of continuous wearing, you have insight into the glucose level every 5 minutes. The glucose measurement range depends on the settings and the exact model of the LinX sensor. Therapy with insulin or other medication can be determined according to the current glucose levels. The exception is for minor users for which the supervision of a guardian via the application is still necessary.
One sensor is used for 15 days, after which the old one is removed, and a new one is applied in the same way.
Additional advantages of the LinX sensor:
- Setting alarms for low and high glucose levels
- Data sharing with other persons
- Filtering glucose data by dates in the app
- Entering data on nutrition and the use of medicines for better health monitoring
Applying the LinX sensor to the body
The applicator also makes applying the sensor to the body easy. It is usually used on the back of the upper arm or on the stomach. Those are the body parts that are not directly exposed.
Before applying the sensor, it is necessary to disinfect a part of the skin with alcohol and let it dry. After that, it is essential to remove the cover from the sensor applicator and place the applicator (gently press) on the part of the skin where we want to put the sensor.
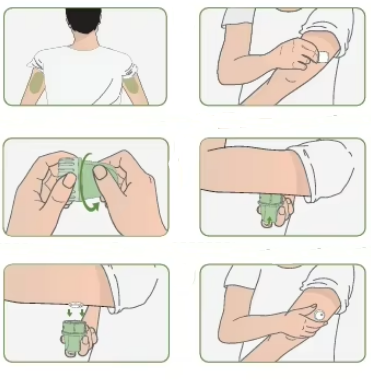
In the next step, press the button for the application on the applicator’s housing and wait a few seconds after the spring sound is heard. This is necessary to ensure that the needle has passed through the skin, left the sensor, and automatically retracted back.
After a few seconds, you can gently pull the applicator while the sensor remains on the skin. The next step is to place tape around the sensor to ensure a good grip.
It is important to note that a wire (eng., sensing probe) remains directly in the skin and under the “box”, not a needle.
Connecting the LinX application to the sensor
After the blood glucose sensor is successfully applied to the skin, the application must be installed. This is the step before you can read the glucose levels later.
You can download the application for your Android phone for free from the Google Play Store. It is available in Croatian and Bosnian. You can always change the language by clicking on the profile icon in the upper right corner, then selecting the option Language.
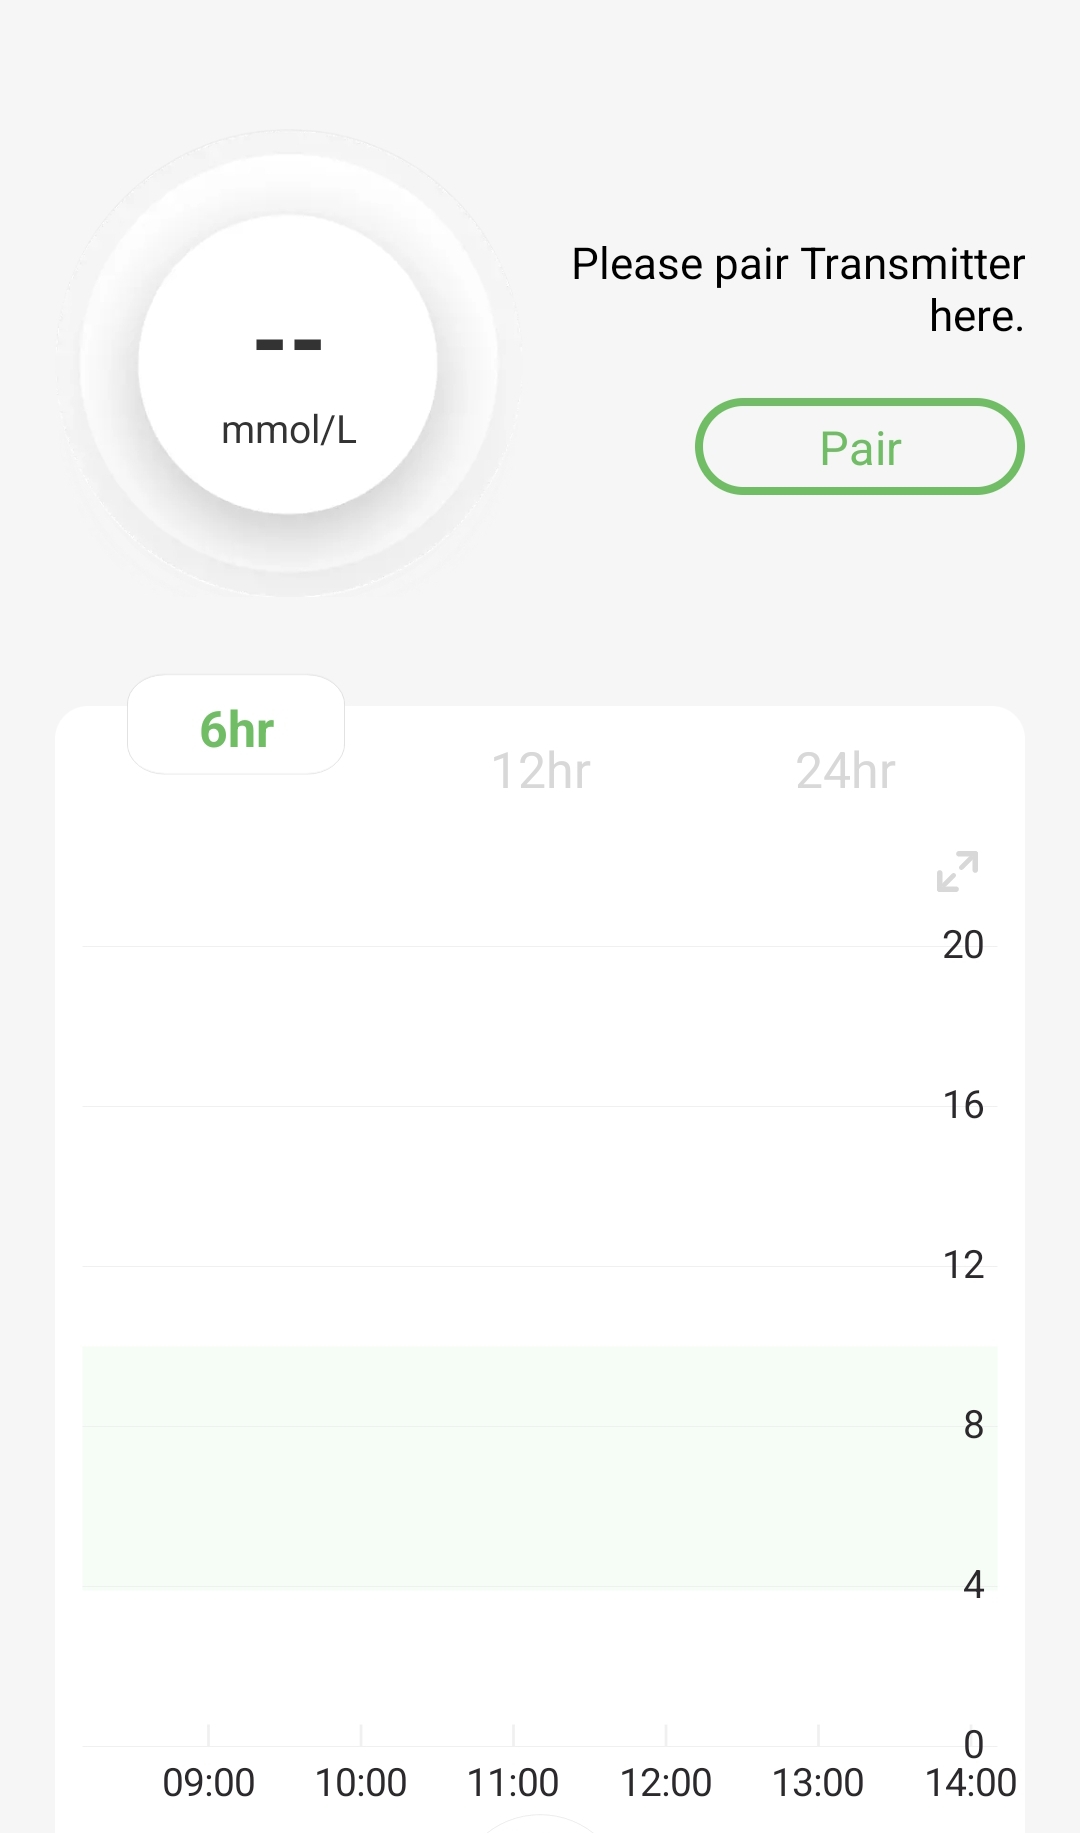
After installation, you must connect the sensor to the phone application. This is done by clicking on the option – Pair – and then entering the transmitter Serial Number or scanning the QR code from the box.
After a successful connection, you can set additional options. I want to mention that, depending on the country in which you live, you may need to adjust the measuring units of glucose. This will make it easier for you to understand and follow the values of glucose readings.
Sharing LinX sensor data with another person
Sharing data with another profile is possible to monitor another person’s health status.
To give the other person access to your data, you must click in the upper right corner of the application (profile icon), select Follow/Share, Share account, and enter the user’s email.
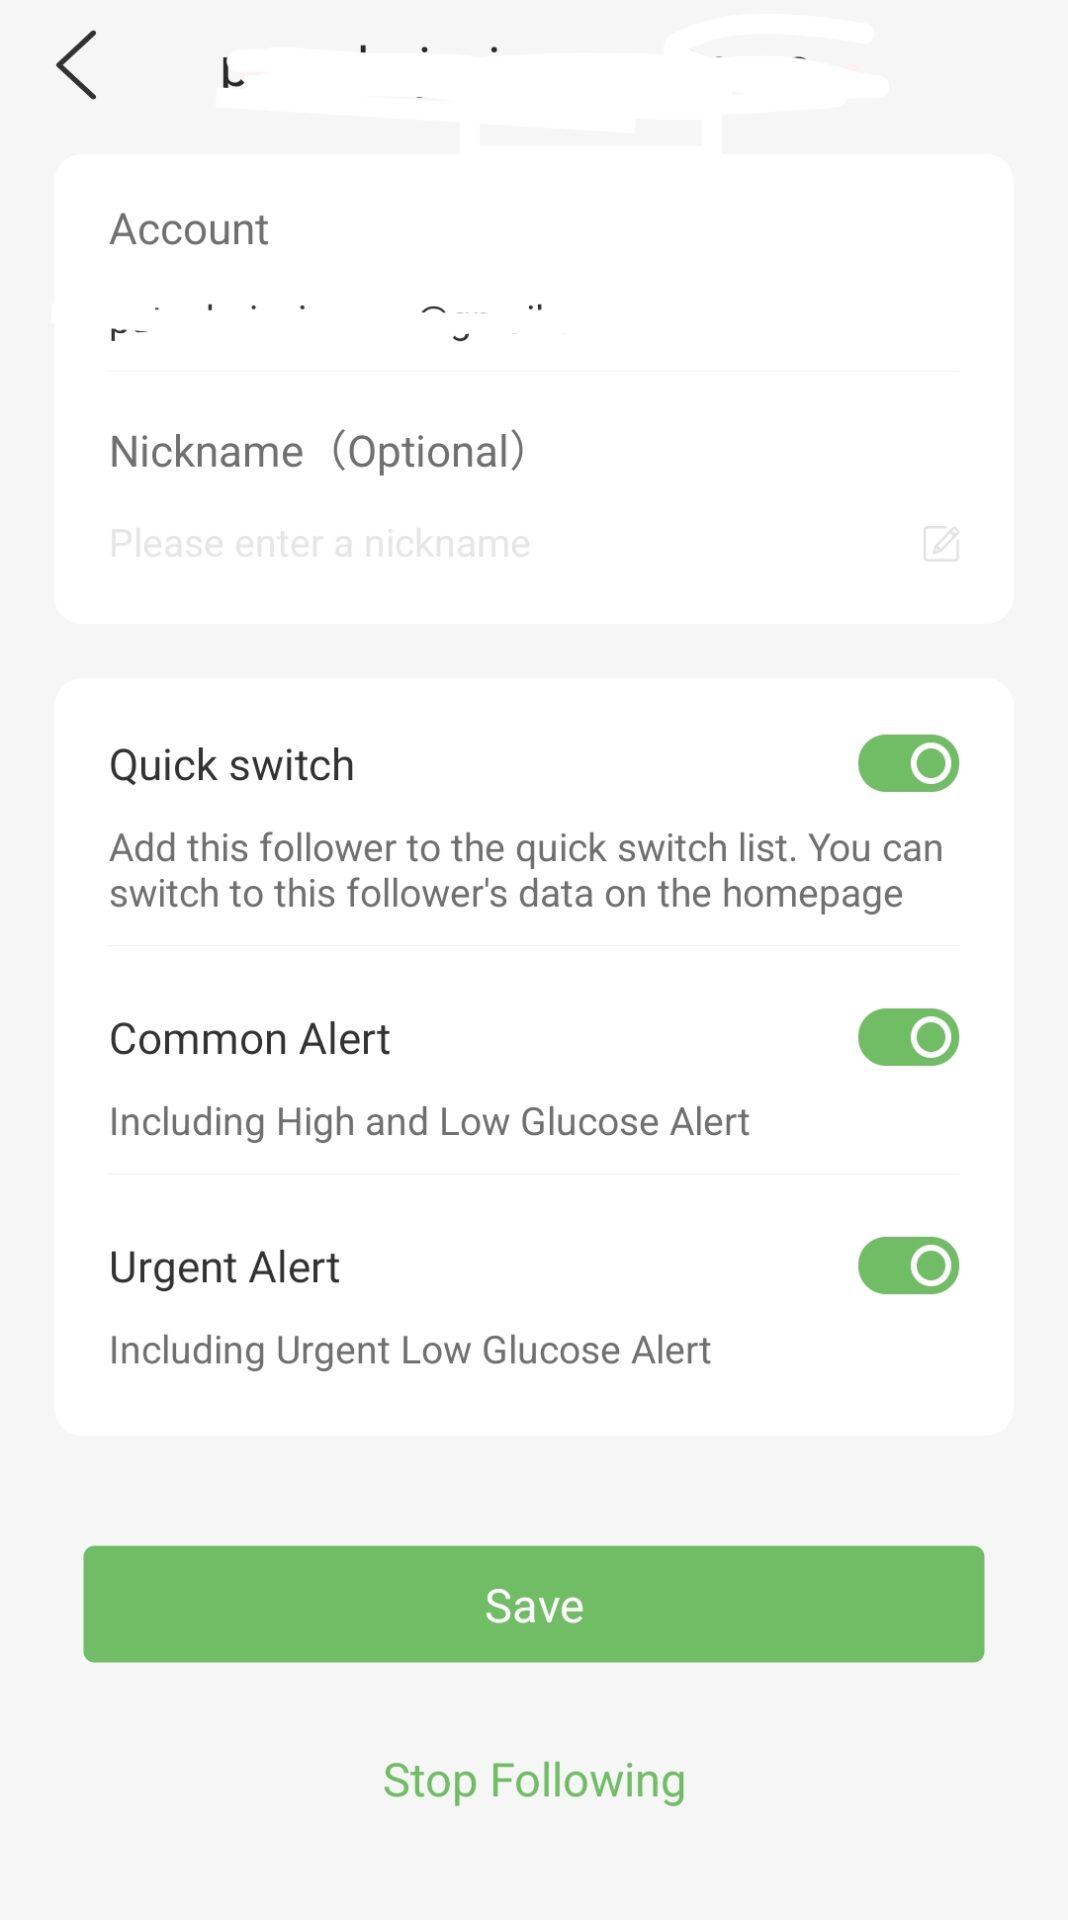
For people who monitor other people’s health, there is an option in the settings to activate alarms at high and low glucose values. You activate that option by clicking on the profile icon, then under – Following -, and on the user’s email.
Reading glucose values in the LinX sensor application
After the successful installation of the sensor on the skin, the application, and its connection with the sensor, the result is read.
Glucose results will be displayed after 1-2 hours from the initial blood sample collection. In this situation, it is recommended that you take the initial values with a margin because you have just installed the sensor. The sensor will make clearer statistics after more glucose measurements.
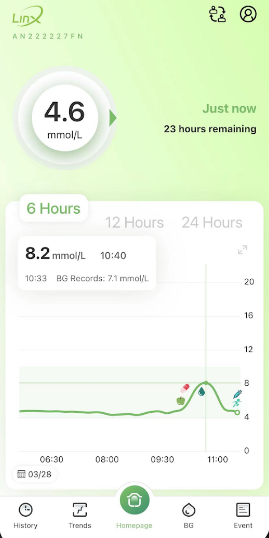
The application’s home screen shows the current glucose level and a graph of the movement of glucose values. It can be noted that base glucose values up to 10mmol/L are good in the application. This is a significant difference compared to the values we get from the laboratory results.
Under – Alert Settings -, located under the profile icon, you can set high and low glucose values, as well as alarm notification values .
LinX Application Options
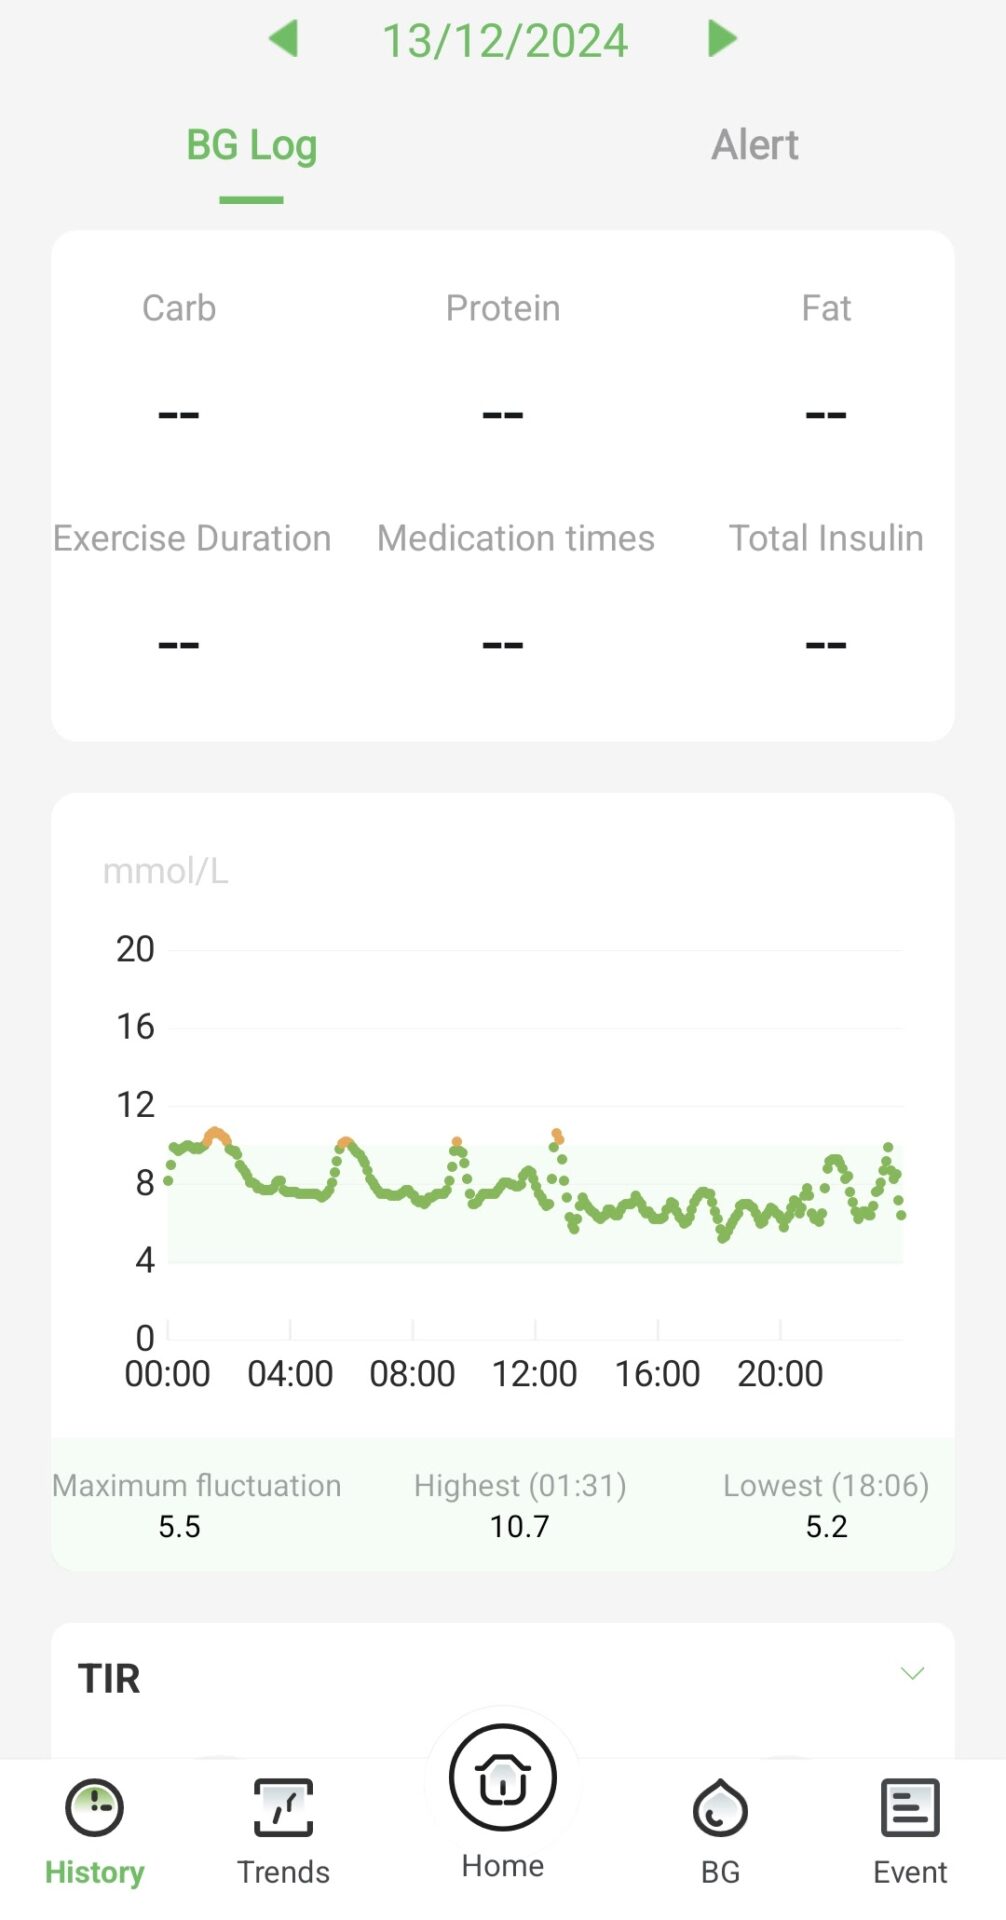
After several hours of measurements, the application displays a graph with the measurement time and values for a specific day.
In addition, it can show you training, therapy, and nutrition data that you previously entered for a specific day.
The option – Alert – displays the above and below glucose levels with the time that it happened.
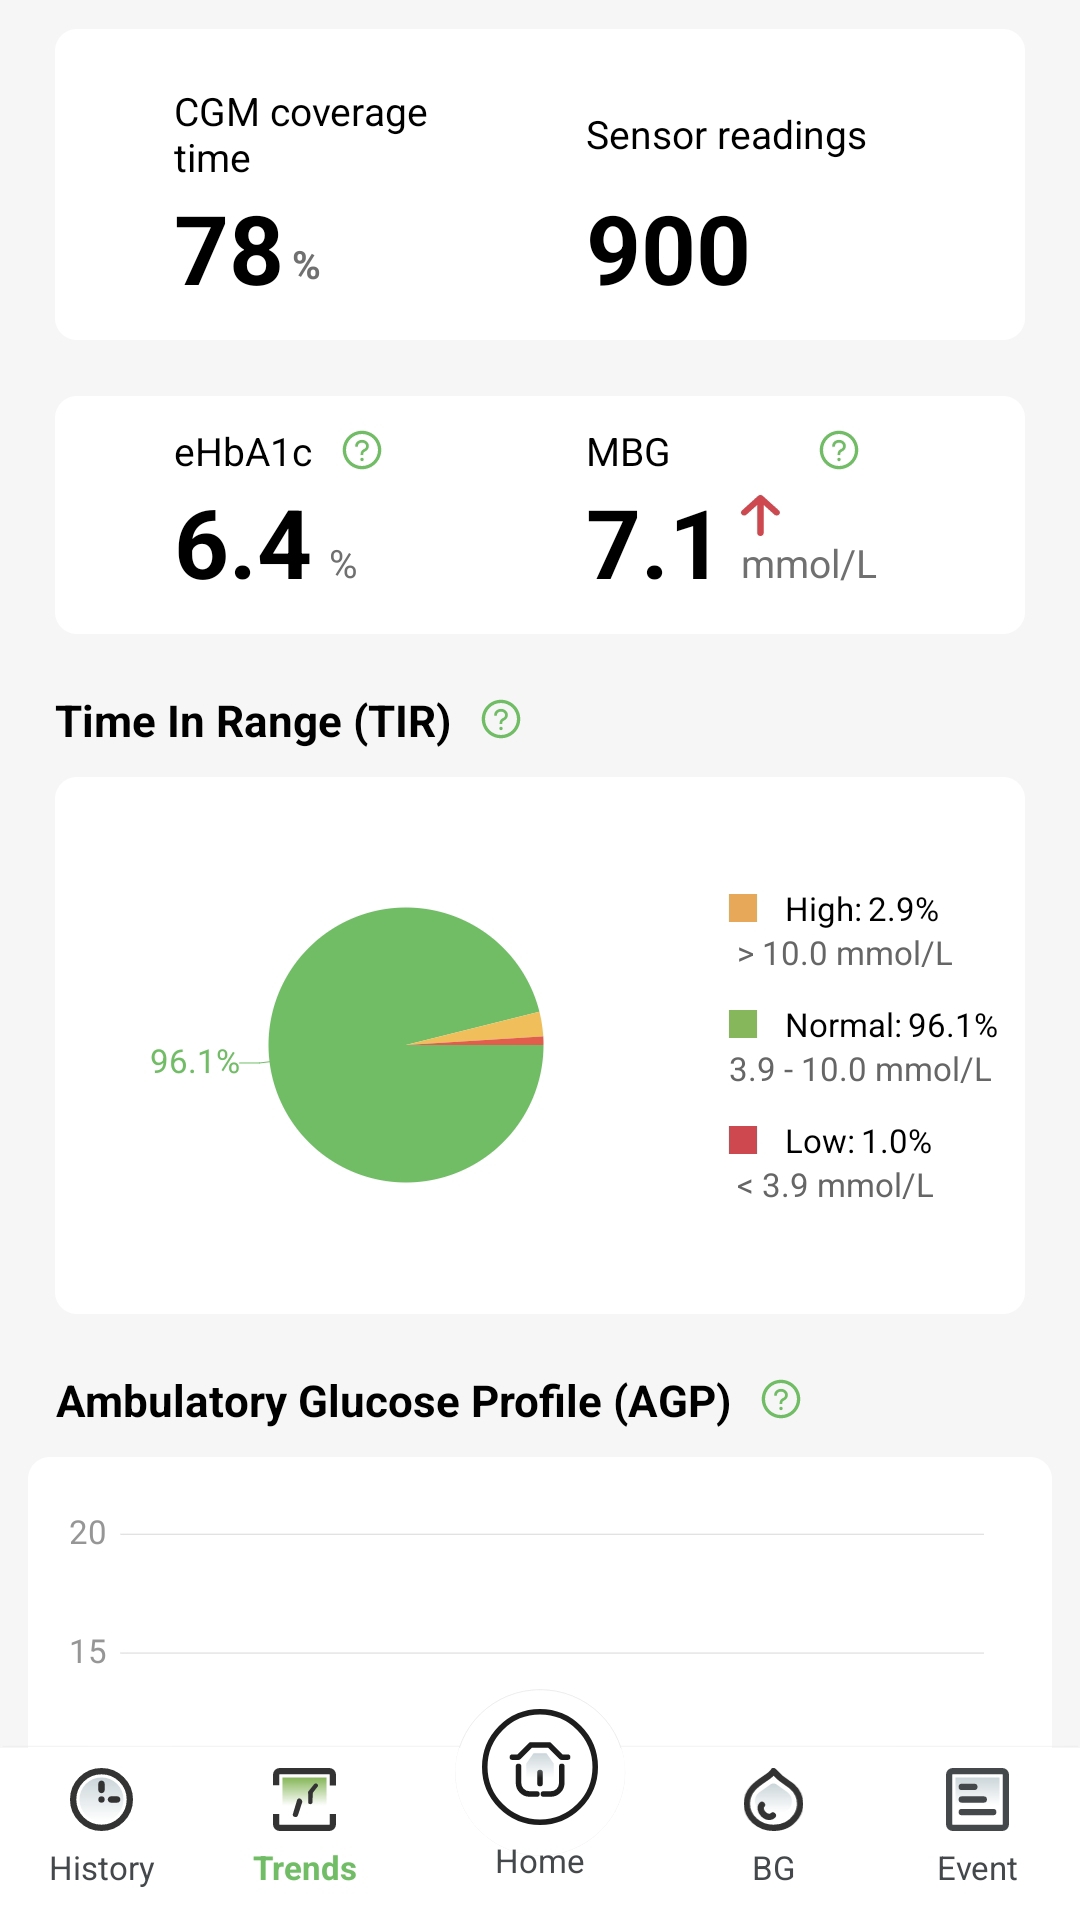
Under the option – Trends – it shows:
- The number of sensor value readings for a certain period
- Percentage of blood glucose sensor coverage
- Graph of glucose values by categorization
- Long term glucose (LMG)
- Glycosylated hemoglobin (eHba1c)
- Ambulatory glucose profile (AGP), which is generated only after 5 days of wearing the sensor.
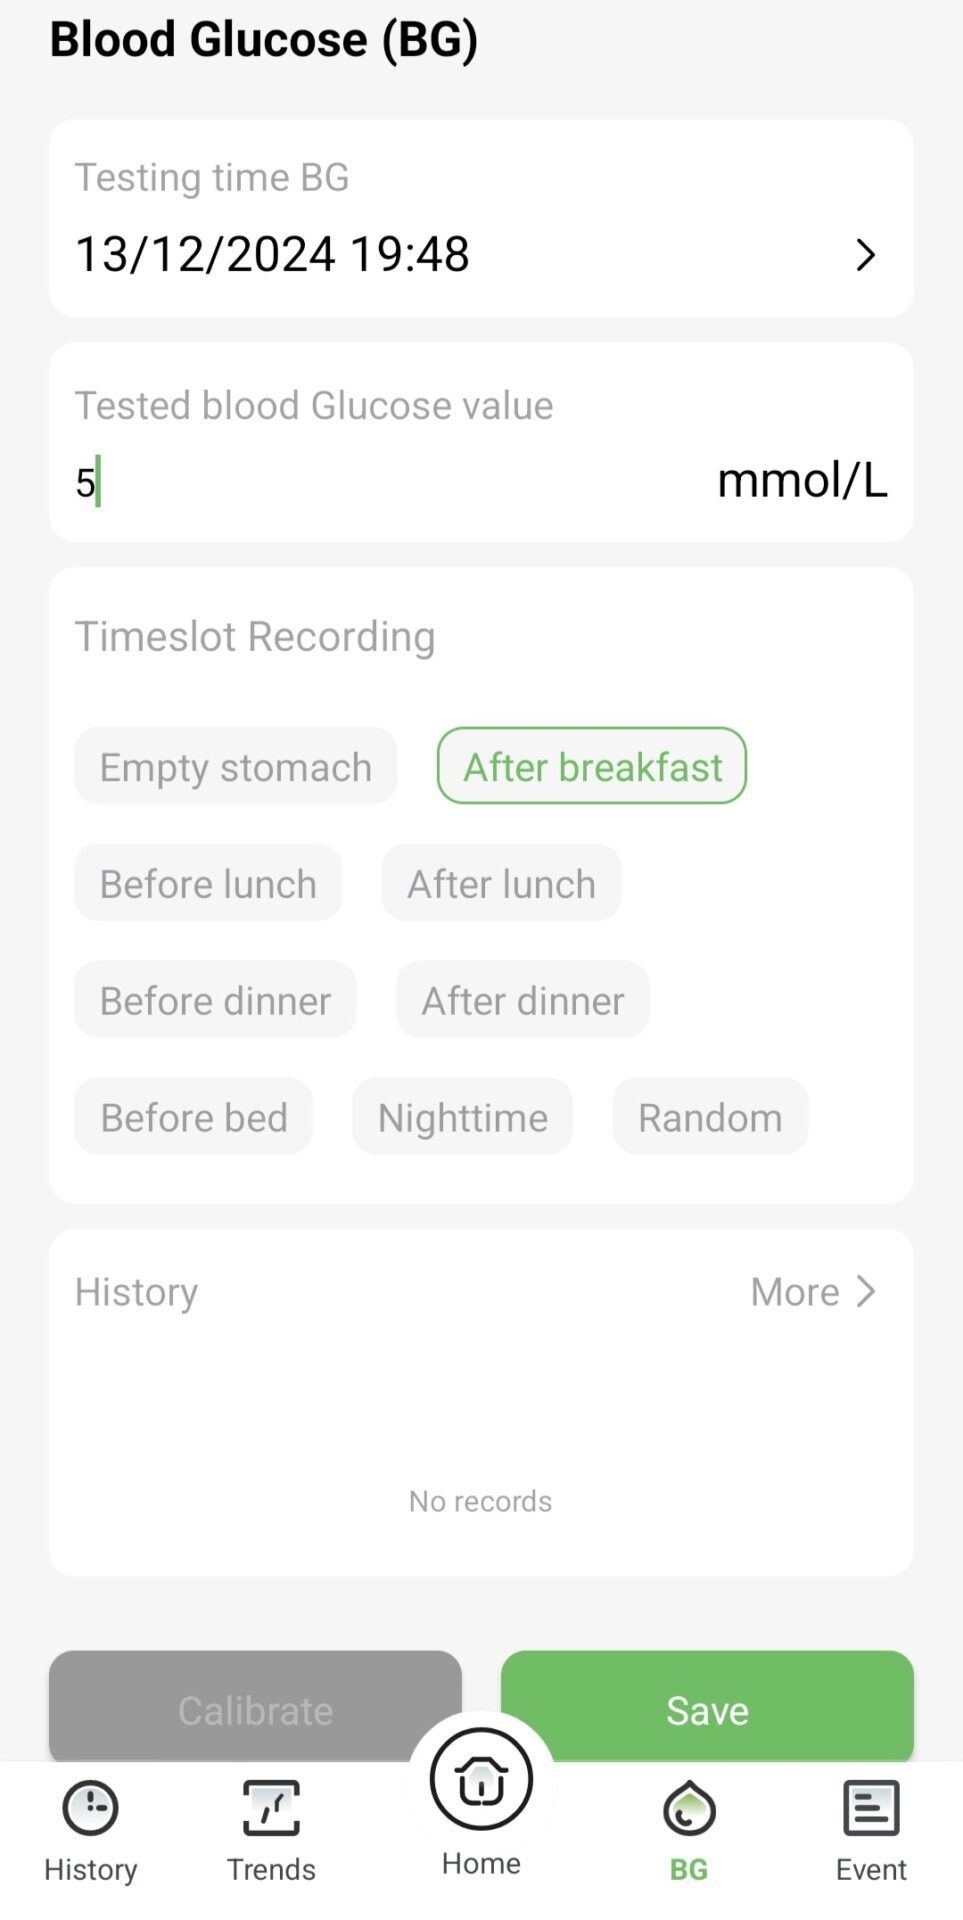
You can enter manual glucose values in the BG (Blood Glucose) option, as well as the period of the day they were measured. The entered values of all daily glucose values will be displayed on the graph ( option -History – ).
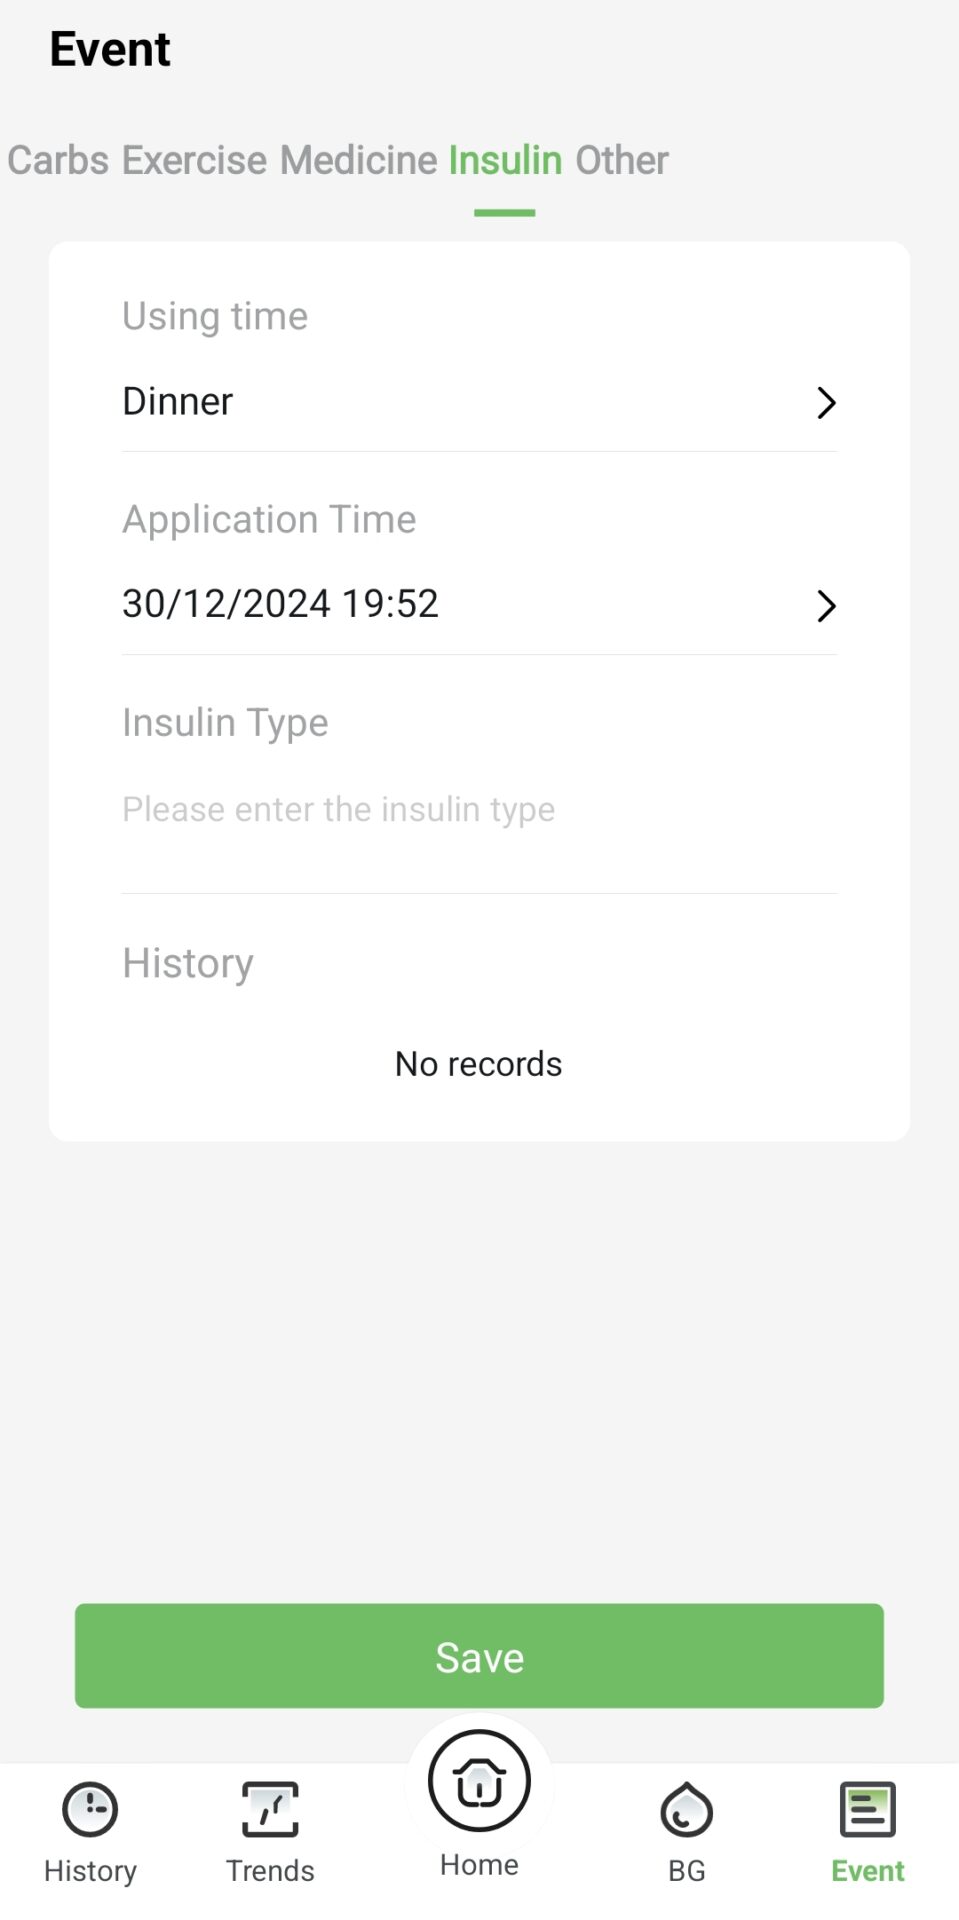
Under the option – Event – you can enter values of carbohydrates, data on exercise, medicines, insulin therapy, and others.
When administering drugs and insulin therapy, you can mark the time of administration in relation to meals, the date and exact time, and the type of drug (or insulin).
We bought this device for long-term independent glucose testing. In a future text, I will write about our experience using this sensor and provide practical advice.
The economic price, practical value display on the phone, sharing option, and light weight of the device are enough to give this new type of technology a chance.